• Dr. Nate Petley - Harvesting Medicinal Plants - Herbal Preparations

    Roasted Chicory Root

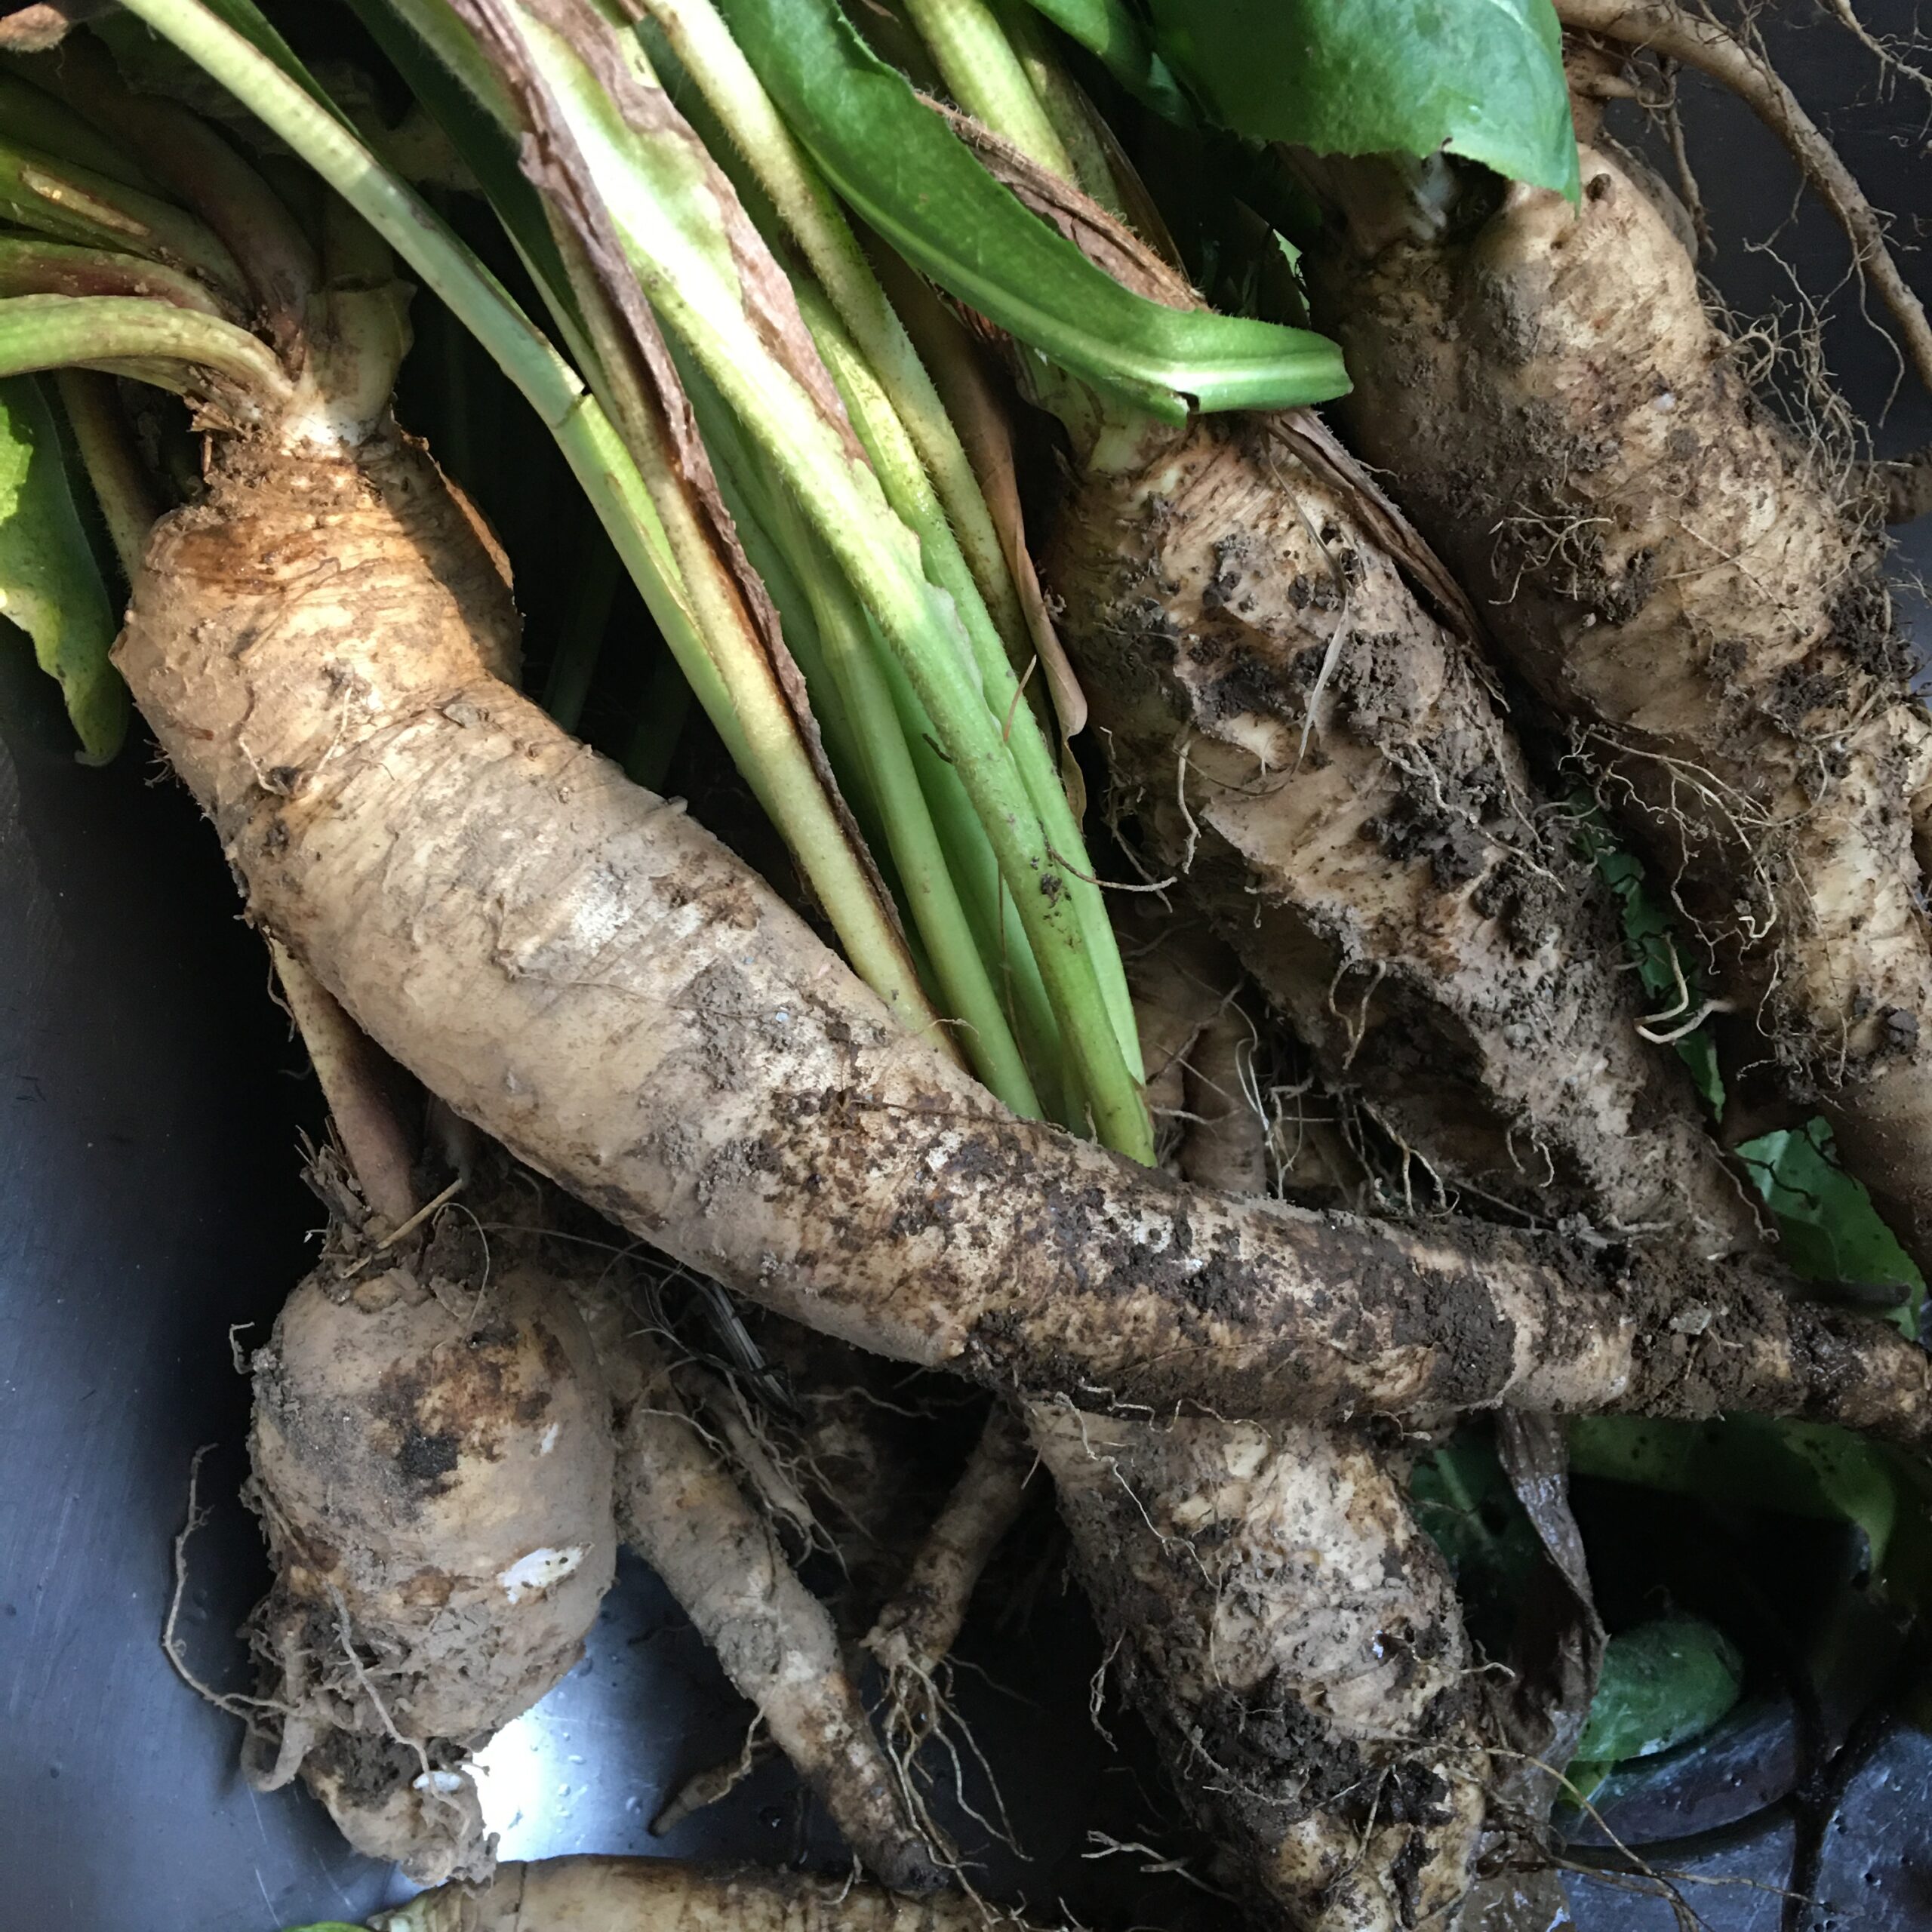
    Harvesting the Chicory Root

    Here in Maine, autumn typically means a slowing down of the typical gardening tasks of weeding and watering and an increase in winter preparation, planting garlic, and in my yard, harvesting and preparing winter roots.

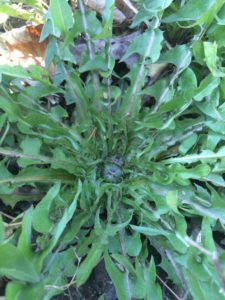
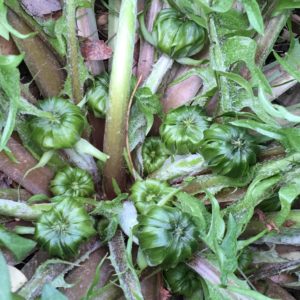
    When the leaves have shifted from their brilliant reds, oranges, and yellows to November browns, I know it’s the right time to start harvesting roots of medicinal and culinary herbs. By November, at least here in Maine, the frosts have killed back much of the garden foliage and the colder temperatures are preventing any significant leaf growth. The herbal teachings engrained in my brain have always directed harvesting the roots (of herbs such as dandelion, burdock, yellow dock, chicory, teasel, and so many more) after the first killing frost when the plant is no longer shuttling nutrients from the leaves to the roots. Chicory is a prime example of a biennial herb that should be harvested in the fall of the first year of growth (or early in the spring of its second year) when it is in its vegetative state and not in the second year when it is focusing on flowering and producing seeds. If the plant has a flower stalk, it is no longer useful to herbalists but look near it because you will likely find the leaves of first year plants.

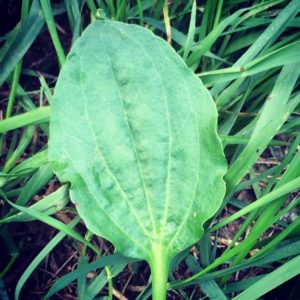
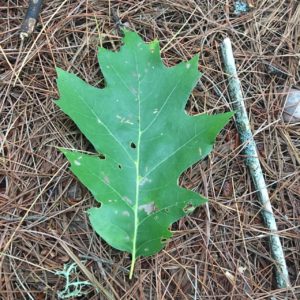
    Take a look in a plant identification book for the proper keying of chicory (Cichorium intybus Linnaeus). Compare similar-looking plants such as large-leaved aster (Aster macrophyllus) and blue lettuces (Lactuca spp.). A related species is Cichorium endiva (better known as endive). Chicory is a member of the Aster family (Asteraceae) and produces daisy-like flowers that are stalk-less and about an inch and a half in diameter. The flowers are bright blue (although they can on occasion produce white and pink flowers) and produced from May to October. The petals are square-tipped and fringed. The flowers tend to close in the late afternoons and whenever it is overcast. The leaves grow in a rosette arrangement, and much like dandelions, they will exude a milky sap when broken. It will typically grow to two to four feet in height (although in rich soil and ideal conditions it can grow much taller).

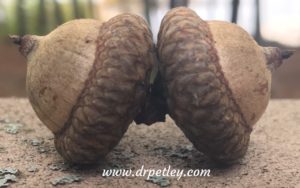
    Chicory is native to Europe but has naturalized throughout the United States. It forms large, fleshy taproots that are surprisingly easy to dig up. I scattered seeds in a corner of the garden and now have a consistent supply every year and enough to keep me supplied with homemade roasted chicory root tea all winter long. Chicory can be found in waste places (wherever there is disturbed soil), fields, pastures, and along roadsides. Avoid those along the roads or anywhere chemicals are a concern.

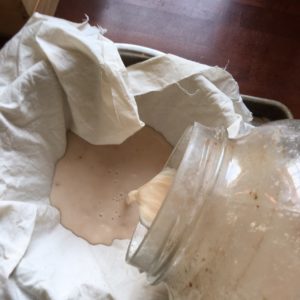
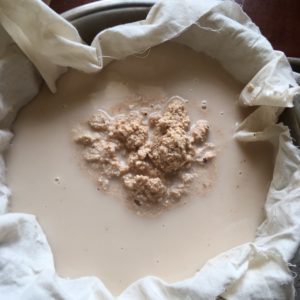
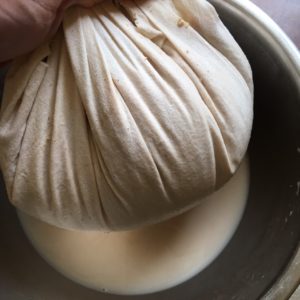
    The roots are washed, chopped and roasted similar to the way dandelion roots are roasted (see link for harvesting, roasting, and making roasted dandelion root tea: Part 1 and Part 2).

    Roasted chicory root tea is an excellent beverage for its earthy and mildly bitter flavors – making it an ideal tea any time of the day. It contains no caffeine and instead offers plenty of beneficial phytonutrients (including inulin). Being mildly bitter, it is supportive of the entire digestive system so consider it as an after-dinner tea especially when blending it with warming spices such as ginger, cardamom, cinnamon, and nutmeg.

    Roasting the Chicory Root

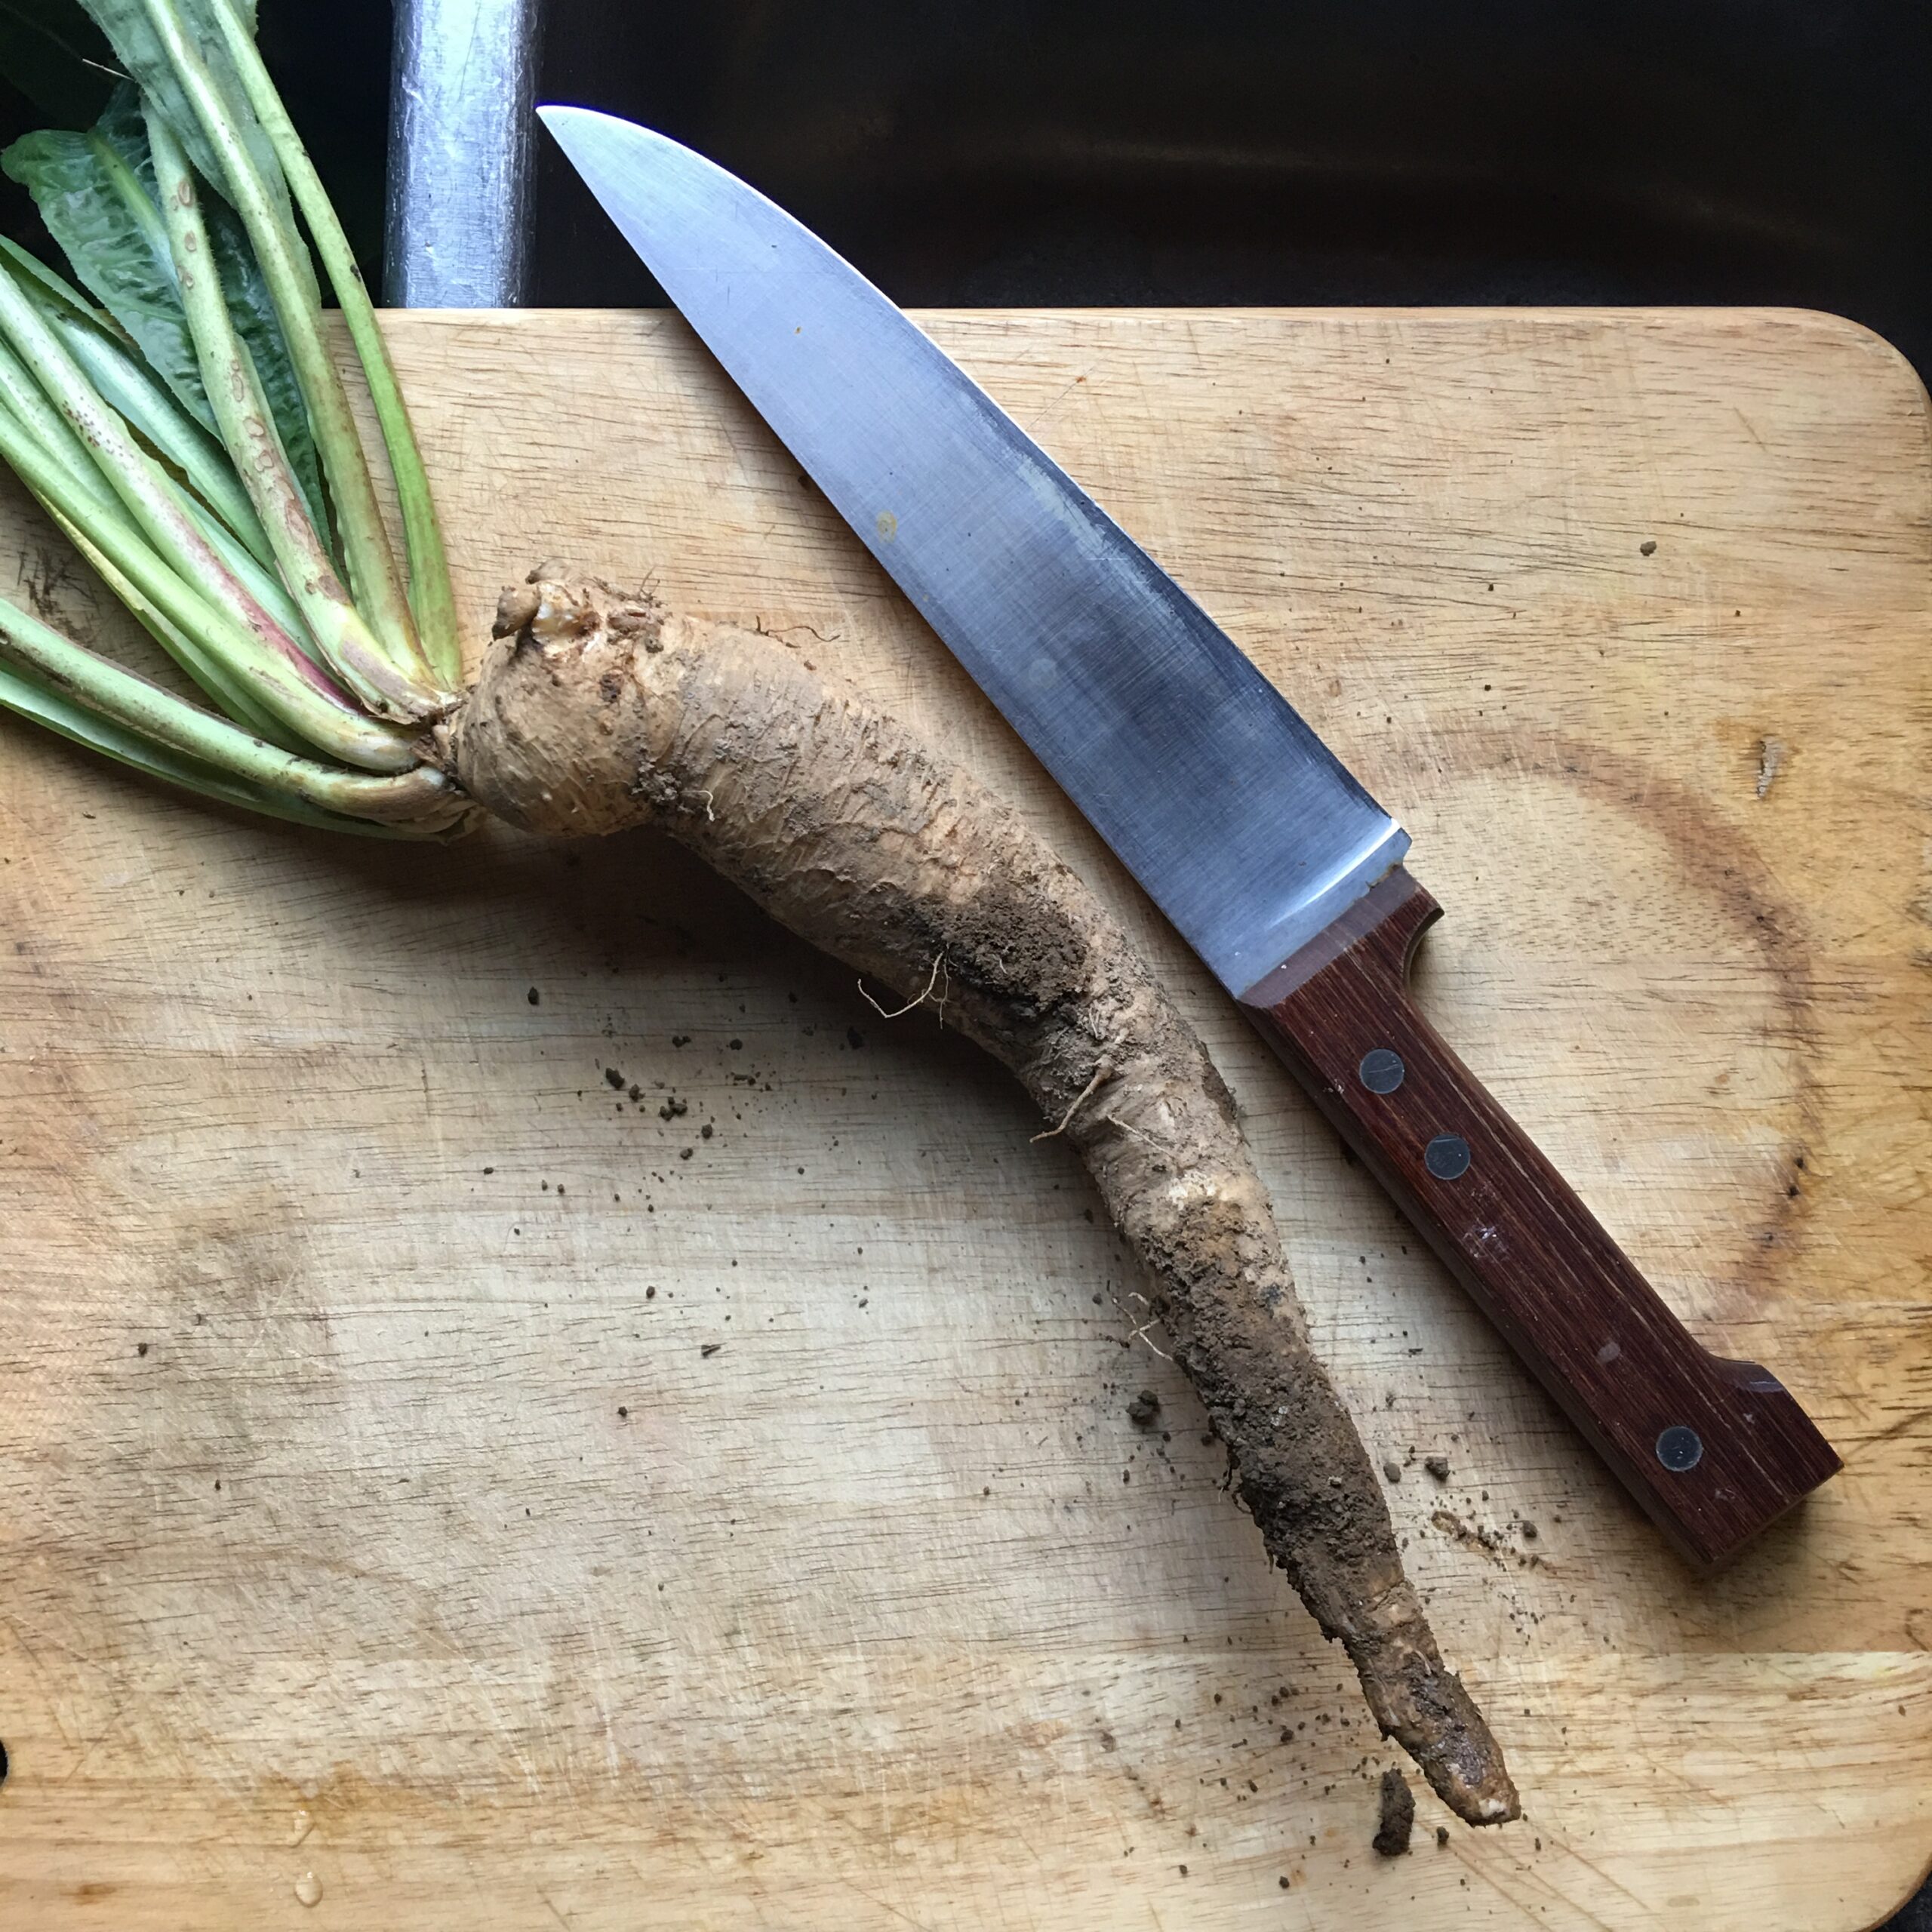
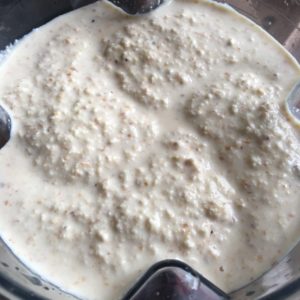
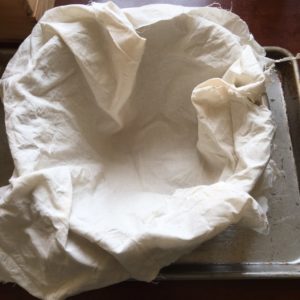
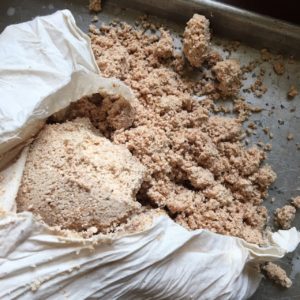
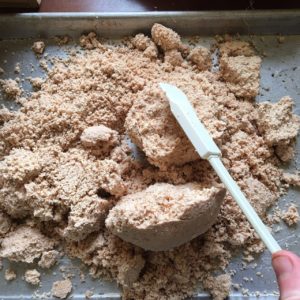
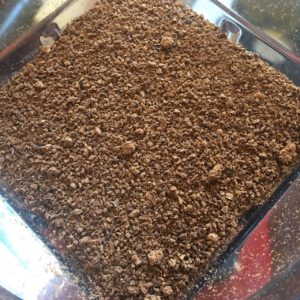
    Wash the freshly dug chicory roots outdoors and cut off the tops (they make great compost!). Pay attention to soil stuck in crevices and any insect holes. Once back inside, preheat the oven to 250F. Give the roots one final wash, inspecting them and cutting out any questionable spots. With a sharp chef’s knife, cut the roots into small pieces, about the size of a pea. Try to make them relatively uniform in size so that they roast and dry at the same rate. Not feeling handy with all that chopping? Another easy method is to rough chop the roots and further work them in a food processor.

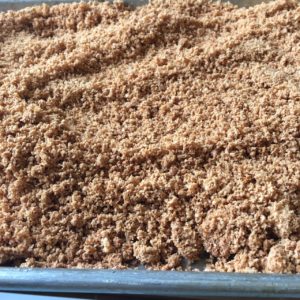
    Lay the chopped roots on a baking sheet, spreading them in a thin layer. It’s faster to use two sheet pans instead of trying to pack it all onto one (trust me on this one). Roast for several hours, checking on them every so often and giving them a stir. Check more frequently as they start to dry and turn brown. The time it takes to finish depends on the size of the roots, the temperature of the oven, and the depth of the layer.

    My pan often gets a little smoky towards the end of the process, so I learned to finish it off outdoors with a gas grill (with the temperature set to its lowest option). If your smoke detector also sounds like it was made for an industrial building, you might like this option, too. I like my chicory root on the darker side of roasted as it offers a more robust flavor in the final brew.

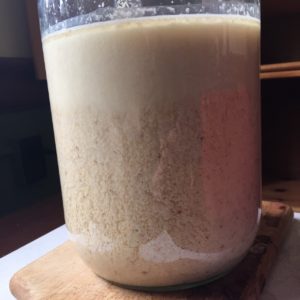
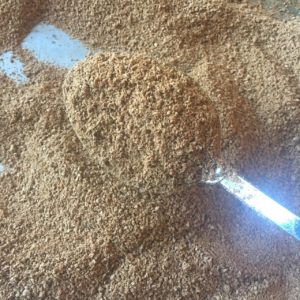
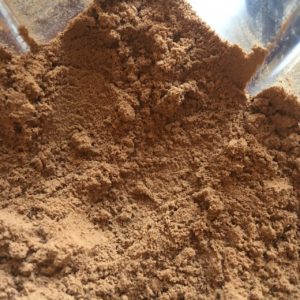
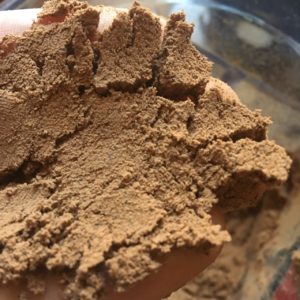
    When the roots are thoroughly dried and sufficiently browned, remove from the heat and allow to cool to room temperature. The roots can be further ground using a mortar and pestle, coffee grinder, or the dry canister of a more powerful blender/mixer until they resemble the texture of ground coffee. You can do this all at once when the chicory root cools, or store them as is and grind them as needed. Store the small pieces or ground chicory in a glass jar for winter storage and place in a cool, dry location away from light. It keeps well for a year, likely longer, but I’ll never know because I tend not to have much left by the next fall regardless of how much I make each year.

    Click here for Brewing Roasted Chicory Root

    [ngg src=”galleries” ids=”1″ exclusions=”5,9,15″ sortorder=”4,1,3,2,6,5,7,8,9,10,12,11,13,14,15,16,17″ display=”basic_thumbnail” thumbnail_crop=”0″]Dr. Nate Petley is a naturopathic doctor and clinical herbalist.  He offers a three-year herb apprenticeship in Maine and lectures throughout New England sharing his expertise in naturopathic and botanical medicine. Dr. Petley blends the art and science of herbalism in his clinic and classroom, relying on his 20 years of experience studying, wildcrafting, and making herbal medicine. Information provided is for educational purposes only. It is not intended to diagnose, treat, cure or prevent any disease, nor is it a replacement for seeking proper medical attention.

    To help keep this site full of information and no ads, please consider a one-time or continual donation to support this website and blog. Ads can slow down page loading, track your whereabouts, and are simply annoying to scroll over when reading an article. Click here to support.

    Dr. Nate Petley, ND  |  www.drpetley.com  |  2020. All rights reserved.  All text and photos are the property of Nathaniel Petley, ND.


  • Dr. Nate Petley - Harvesting Medicinal Plants - Herbal Preparations

    Brewing Roasted Chicory Root

    Brewing Roasted Chicory Root and Recipes

    Brewing Roasted Chicory Root

    Don’t let anyone tell you roasted chicory root tastes just like coffee, but do believe those who find it enjoyable to drink as a standalone beverage. For the environmentally-aware, substituting part of your daily coffee with locally roasted chicory root can help take the pressure off global coffee resources and negative impacts to the rainforest. For those completely caffeine-free, this makes an excellent brew any time of the day. Learn how to harvest and roast your own chicory root here.

    A simple herbal tea can be made using one teaspoon per cup. For a robust brew that offers the mouth-feel of coffee, I like using one tablespoon of ground roasted chicory root per cup of water. Place the measured roots into a heat-proof container (tea pot, canning jar, French press, etc.) and pour in the appropriate amount of boiling water. Let steep covered for 10 minutes or so (longer is fine as it does not get overly bitter). Strain and pour into your favorite mug! Try one of the recipes below and as always, adjust according to your own preferences.

    Recipes

    Roasted Chicory Root (Coffee Substitute)

    1 tablespoon roasted chicory root

    1 cup boiling water

    Steep 10 or more minutes. Strain and enjoy.

    Variations: throw in a pinch of cardamom, nutmeg, or cinnamon (or your favorite blend) just before adding the water.


    Roasted Chicory Root (Tea)

    1 teaspoon roasted chicory root

    1 cup boiling water

    Steep 10 or more minutes. Strain and enjoy.

    Variations: throw in a pinch of cardamom, nutmeg, or cinnamon (or your favorite blend) just before adding the water.


    Wild Root Mocha Java

    2 tablespoons coffee

    1 tablespoon raw cacao

    1 tablespoon roasted chicory root

    3 cups boiling water

    Steep 10 minutes, strain, and enjoy.


    Wild Root Brew

    1 tablespoon roasted chicory root

    1 tablespoon roasted dandelion root

    2 cups boiling water

    Steep 10 minutes, strain, and enjoy.


    Vegan Roasted Chicory Root Latte

    2 tablespoons roasted chicory root

    1 cup boiling water

    1 cup warmed almond milk (or coconut, cashew, soy, etc.)

    2-3 teaspoons of maple syrup

    Dash of cardamom, nutmeg, cinnamon (or your favorite spice blend)

    Simmer the root in the water for 10 minutes. Meanwhile, warm the almond milk (no need to boil) with the maple syrup.  Strain the roots and pour into your favorite mug. Briskly whisk the almond milk and pour into your mug. Top with a dash of spice. Makes two 8-ounce cups. 

    Dr. Nate Petley is a naturopathic doctor and clinical herbalist.  He offers a three-year herb apprenticeship in Maine and lectures throughout New England sharing his expertise in naturopathic and botanical medicine. Dr. Petley blends the art and science of herbalism in his clinic and classroom, relying on his 20 years of experience studying, wildcrafting, and making herbal medicine. Information provided is for educational purposes only. It is not intended to diagnose, treat, cure or prevent any disease, nor is it a replacement for seeking proper medical attention.

    To help keep this site full of information and no ads, please consider a one-time or continual donation to support this website and blog. Ads can slow down page loading, track your whereabouts, and are simply annoying to scroll over when reading an article. Click here to support.

    Dr. Nate Petley, ND  |  www.drpetley.com  |  2012. All rights reserved.  All text and photos are the property of Nathaniel Petley, ND.

  • Dr. Nate Petley - Harvesting Medicinal Plants

    5 Useful Wild Weeds From Your Backyard

    I wandered the backyard this morning before work to see what was popping up in my central Maine gardens. With these past few rainy days of spring, plants are slowly pushing through the soil. Truth be told, I was really just hoping the dandelions were up enough for a little snack. I was in luck! I was able to forage enough leaves for a quick sauté with garlic and have enough for a fresh tea later in the day.

    I love this time of year! This first taste of wild greens effectively shook off the last clutches of winter. Spring, for me, has officially arrived. I will be foraging the backyard from now until after snowfall, collecting for food and herbal medicine. The following herbs, in no particular order, are just a few I encourage to grow where they like. 

    1. Dandelions (Taraxacum officinale, Asteraceae):

    Dandelion LeavesWhy struggle and fight with the dandelions? As the saying goes, “If you can’t beat ‘em, join ‘em!”  I say, “If you can’t beat ‘em, eat ‘em!” Dandelions are one of the first flowers in spring that provide food for bees and other insects. This in turn keeps them around later when our vegetable gardens are in bloom with peas, beans, tomatoes, and squash. It just so happens that these dandelions are also one of our sources of wild food!

    The entire dandelion plant is edible – leaves, roots, flowers, and buds.  The leaves can be harvested as soon as they start growing and added fresh to salads, sautéed, or when they get larger cooked as a potherb, much like one cooks spinach. The leaves are most tender (and less bitter) before flowering and easy to collect by snipping off individual leaves at the base, thereby preserving the root and crown to produce more leaves and flower buds. They are also easier to clean this way. The leaves are a powerful source of fiber, vitamins (including A and C), and minerals (including calcium and potassium). Medicinally, the bitterness of the leaves stimulates the appetite and supports the entire digestive system. They have a special affinity to the kidneys and act as a useful diuretic; they are so potassium-rich that they replenish faster than depleting potassium, unlike most diuretics.

    The roots are useful as a liver tonic and digestive aid. They can be harvested late fall after the first killing frost or early spring before much leaf growth has developed. I either decoct them into tea (download a free quick guide here) or roast them and use all winter as a flavorful and rich roasted dandelion root beverage. It can be used as a, dare I say, coffee substitute. (Click here to learn how to harvest the root and make the brew!)

    The flower buds can be made into delicious wild capers (click here to learn how). Be sure to allow some of the buds to develop into flowers for the insects. The flowers can be dipped in batter and deep-fried or fermented into a tasty wine.

    1. Yarrow (Achillea millefolium, Asteraceae)

    Yarrow is an excellent addition to the flower garden or along the lawn edge. They can grow one to two feet tall and have beautiful white flowe
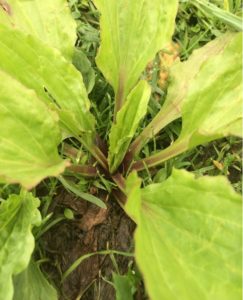
rs. I look for the small highly dissected leaves in my lawn and transplant them into my garden in large masses. Each year I harvest the flowers (snipping just blow where the flowers join the stem). Of course, I leave plenty for the bees and butterflies and for self-seeding. Medicinally, it has a long history of use as a diaphoretic (causing the body to raise its own thermostat triggering the body to sweat) and antimicrobial, making it shine when used for the cold and flu. Historically, it has been added to formulas for hemorrhoids. Because the herb is quite bitter, I prefer making a tincture from either fresh or dried flowers. It can also be used topically as a poultice for its styptic and anti-inflammatory properties. Poultices are made by chewing on the leaves or flowers (or macerate in a mortar and pestle) until it is a pulpy, watery mush, and in this case,applied to minor scratches to stop bleeding. When hiking, I always ask my friends in need if they’d like to chew and spit the yarrow on their bleeding scrapes, or shall I. They never seem to mind or complain about that bitterness!

    1. Common Plantain (Plantago major, Plantaginaceae)

    Plantain is a non-native, well-established wild plant, appropriated dubbed “white man’s footprints” due to the fact that it was introduced when the early settlers arrived from Europe and it grew wherever they walked. It is a plant that grows best in disturbed soil (look for them in lawns and gravel driveways). This is an herb with endless uses as a poultice. It is soothing and cooling to bug bites, sunburns, poison ivy, and minor scrapes and scratches.  Simply chew on a fresh leaf (or macerate in a mortar and pestle) until it is a pulpy, watery mush. Then simply smear some on the afflicted skin. The leaves can also be made into a tea and sipped on for quick heartburn relief or used as a mouthwash for sore gums and cankers.  The seeds can be chewed as a source of healthy oils and fiber – this is our version of Plantago ovata, the source of commercially-grown psyllium seed.


    1. Red Clover (Trifolium pratense, Fabaceae)

    Clover is commonly found in lawns and gardens – just look for the signature three (and if you’re lucky four) leaves.  It is commonly used as a cover crop in fields to help suppress other weeds and then easily turned with a spade or tilled. Clover, being a member of the legume family, is beneficial to the soil and surrounding plants as they are nitrogen-fixers. The roots contain nodes that work with symbiotic bacteria in order to capture nitrogen in the air and make it readily available to the plant.

    Clover blossoms are attractive to many insects including butterflies and wild bees. Harvest after the morning dew has dried and either use fresh or quickly dry for use as a winter tea (be sure that the blossoms do not brown in the drying process). They are also make fun additions to salads for a little color and touch of sweetness. I love adding whole blossoms to my sun teas. The leaves are rich in minerals and make a tasty tea. Medicinally, the flowers are used as a liver and blood cleanser and for skin conditions such as eczema. They are also rich in phytoestrogens making them a common herb to add to formulas addressing the menstrual cycle and menopause.

    1. Goldenrod (Solidago spp., Asteraceae)

    While often considered the source of all fall allergies, this showy late summer/fall flower is unfairly blamed while the inconspicuous common ragweed (Ambrosia artemisiifolia) goes unnoticed. Both are in the same Asteraceae family, but in different tribes (Astereae vs Heliantheae) which is why they look very different from each other. More importantly, the pollen of goldenrod is sticky so that it is readily carried to other flowers by way of bees and other pollinators, not by air. The pollen of ragweed, however, is designed to be airborne and is not spread by bees; the plant produces an abundance of pollen that can be carried for miles in the wind. The goldenrod is an excellent plant to allow growing at the edge of the lawn and in the garden partly for its simple beauty but also because it is one of the last sources of food for bees. Medicinally, the flowers can be made into a tea or tincture and used for mild kidney and lung complaints due to its diuretic, anti-inflammatory, and antiseptic properties. Unlike popular belief, goldenrod can actually be used for allergy season.

    Dr. Nate Petley is a naturopathic doctor and clinical herbalist.  He offers a three-year herb apprenticeship in Maine and lectures throughout New England sharing his expertise in naturopathic and botanical medicine. Dr. Petley blends the art and science of herbalism in his clinic and classroom, relying on his 20 years of experience studying, wildcrafting, and making herbal medicine. Information provided is for educational purposes only. It is not intended to diagnose, treat, cure or prevent any disease, nor is it a replacement for seeking proper medical attention.

    To help keep this site full of information and no ads, please consider a one-time or continual donation to support this website and blog. Ads can slow down page loading, track your whereabouts, and are simply annoying to scroll over when reading an article. Click here to support.

    Dr. Nate Petley  |  www.drpetley.com  |  2019. All rights reserved.  All text and photos are the property of Nathaniel Petley, ND.

  • Dr. Nate Petley - Harvesting Medicinal Plants - Herbal Preparations

    Dandelion Capers

    Dandelion Capers

    Nothing is more satisfying than foraging food from the backyard.  This spring I have been eating dandelion greens at least twice a day, sauteed in olive oil and garlic.  They are high in trace minerals, calcium, and iron, and vitamins A, C, and B6 – a very nutritious early spring addition to any meal.  Best of all, they are free!  Be sure to only collect from clean lawns and gardens that have not been sprayed with herbicides and pesticides.   

    Dandelion Flower Buds ~ Dr. Nate Petley
    Dandelion Flower Buds ~ Dr. Nate Petley

    Sure, us weed-eating folks do get quizzical looks when munching on things in the lawn.  While we won’t likely convince everyone to chow down on bitter dandelion greens, we might be able to prove their worth with this simple recipe utilizing the flower buds.  Next time you reach for capers in a recipe, try dandelion capers instead!  They add pizazz to salads and pasta dishes, and they are extremely easy to make.

    Dandelion Flower Buds ~ Dr. Nate Petley
    Dandelion Flower Buds ~ Dr. Nate Petley

    Before the dandelion flowers open in spring, collect a handful or so of small buds (they should be bright green and almost spherical).  I pick a few of the buds from lots of different plants around the garden because dandelions are one of the earliest available flowers for bees and nectar-loving insects.  Please don’t mow, don’t spray, and don’t dig.

    Making Dandelion Capers ~ Dr. Nate Petley
    Making Dandelion Capers ~ Dr. Nate Petley

    Once you have collected a few, place them in a small jar and cover with vinegar (I use raw apple cider vinegar because after I eat the capers I use the leftover vinegar on salads).  Some online recipes suggest using dilute vinegar, but I use it straight up because dandelions are full of water which naturally dilutes the vinegar a little.  Add salt as desired – capers are traditionally salty so don’t be shy with the salt.  Cover and shake gently until the salt dissolves.  Let set about a week before tasting them; adjust the salt as needed.  They will last for several months in the refrigerator, except that I eat mine long before they ever get a chance to spoil.

    Making Dandelion Capers ~ Dr. Nate Petley
    Making Dandelion Capers ~ Dr. Nate Petley

    Try some tasty variations on this simple recipe.  Add garlic, peppercorns, coriander seeds, dill, oregano, rosemary – you get the picture.  Also try different types of vinegar, like red wine, white balsamic, or homemade.

    Back to the dandelion greens… As soon as the snow melts and the dandelion leaves start to grow, pluck individual leaves from all around.  This is my preferred method of harvesting.  Growing up, we would take a knife and cut the entire rosette of greens.  Over the years I have learned that this only ensures a sink full of soil, leaf litter, and burrowing insects.  Now, I just pluck leaves for a cleaner harvest requiring only a few quick rinses before eating. 

    Dandelions: nutritious, delicious, and wild!  Happy harvesting!


    Dr. Petley
    Dr. Nate Petley, Naturopathic Doctor & Clinical Herbalist

    Dr. Nate Petley is a naturopathic doctor and clinical herbalist.  He offers a three-year herb apprenticeship in Maine and lectures throughout New England sharing his expertise in naturopathic and botanical medicine. Dr. Petley blends the art and science of herbalism in his clinic and classroom, relying on his 20 years of experience studying, wildcrafting, and making herbal medicine.

    Dr. Nate Petley  |  www.drpetley.com  |  2017. All rights reserved.  All text and photos are the property of Nathaniel Petley, ND.

  • Dr. Nate Petley - Harvesting Medicinal Plants - Herbal Preparations

    DIY: Acorn Flour

    acorns-2

    The days are shortening and the nights are getting cooler. The animals are scurrying around preparing for the winter ahead.  The leaves have already turned their brilliant reds and yellows and oranges, and are now settling on autumnal tans and browns.  A new scent of decaying leaf litter fills the nose.  The wind rattles drying leaves still hanging on their branches above.  The squirrels laugh from high on the branches and dart about.  This walk through the woods is a noisy walk, unlike the peaceful quietude of a morning stroll during the summer. Thuds, boinks, and plunks start from overhead and then sound as if they are coming from all directions.  It’s almost as if someone, or something, is practicing using a sling shot from above.  A crunch underfoot startles the meditative mind and a quick glance down indicates what was stepped on.  Acorns!  

    Oaks are deeply embedded in culture and lore, but in many areas today they are cast aside as nothing more than yearly sources of leaves to rake.  However, the forgotten acorn is not forgotten by the animals of the woods; it is a source of food that sustains life.  Ralph Waldo Emerson stated it best, “The creation of a thousand forests is in one acorn.”  Endless years of food, shelter, and oxygen.

    It is unfortunate that the early stories of acorns being a source of food for people turned into warnings of “Don’t eat those, they will make you sick.”  Although rightly so, the acorn eaten raw might make one sick, the wise warning tends to stop there making it sound like acorns are highly poisonous.  Over time, people have learned to depend less on wild food and opt more for the field and plow.  It’s been so long since eating acorns was considered completely normal that folks have forgotten the art of processing them into edible food.  In today’s culture, there are far fewer grandmas and grandpas who share stories of their own elders eating acorns during times of hardship, and even more members of the younger generations who consider eating an acorn a foreign idea.  Except that it needn’t be that way.

    Processing the acorns to make them palatable and digestible is not rocket science – one just needs to understand a few guidelines that were established millennia ago.  Our ancestors knew how and it’s time we experience it again.  Oak trees can be found in temperate forests all around the world and have long been a source of highly nutritious wild food and medicine.  Acorns of any species of oak can be processed into food, but there are nuances between various species that an acorn connoisseur might consider when choosing the trees from which to harvest.

    So, before assuming acorns are only for squirrels, consider collecting a few to make your own flour.  Try different species and different methods to process them.  The flour can be incorporated into pie crusts, pancakes, and gluten-free recipes, added to soups and stews, or eaten like a nut.  The options are endless once the acorn is properly processed.

    Red Oak Leaf
    Dr. Petley – Red Oak Leaf

    The first rule to harvesting wild food is to identify the plant (or tree) before collecting.  Here is the leaf of the red oak (Quercus rubra). Generally, red oak leaves have pointed lobes whereas white oak leaves have rounded lobes.  If you are unsure about your local trees, ask an herbalist or someone knowledgeable about wild plants.  Review several field guides that include our local region.

    Dr. Petley - Red Oak Acorn
    Dr. Petley – Red Oak Acorn

    This is a picture of an acorn from the red oak.  There are two basic groups of oaks: red (also labeled as black) and white.  One way to distinguish oak groups is to look under the acorn cap.  The inner surface of the white oak acorn cap will be smooth.  The inner surface of the red oak acorn cap will be covered in velvety hairs.  Acorns in the red oak category of trees take two seasons to mature and the dropped acorns will germinate in the spring of the following year, whereas the acorns in the white oak category take only one season to mature and will germinate once they fall to the ground.  It takes about 25 years for the red oak to start producing acorns and about 50 years for it to produce a sizeable crop. 

    Acorns of the red oaks are higher in tannins and said to be bitterer (some dictionaries argue and prefer the phrase more bitter) than acorns of the white oaks.  Remember, all acorns contain tannins, just varying concentrations.  These tannins are water soluble constituents that are easily leached out by soaking the acorns and changing the water, making the acorns palatable.

    Dr. Petley - Red Oak Acorns
    Dr. Petley – Red Oak Acorns

    Collecting and processing acorns for food should be a social event with family and friends – also, include passersby who might be curious as to why you are collecting acorns.  Consider offering acorn-made treats so everyone can confirm that acorn flour is indeed an ideal food.  This is how we once again collectively normalize a once-standard autumn event.

    Dr. Petley - Cracking Red Oak Acorns
    Dr. Petley – Cracking Red Oak Acorns

    Once collected, the acorns need to be split open in order to collect the bitter meat.  I will add here that the most time consuming and labor intensive part of making acorn flour is the cracking of the shells.  Some use a heavy stone in order to crack the shell.  I tend to use what I had on hand, which is often a nut cracker and nut pick.  It works fine for small batches, but I would opt for the heavy stone for an entire harvest because it would be easier on the fingers.  I’ve heard of some running over them with cars but I’ll leave that experiment for another time.

    There are two ways to process acorns: with or without heat.  Both involve soaking in water to leach the tannins. The method shown here is the method that does not involve heat.  It takes longer to leach the tannins, but it helps retain the natural oils. The other method involves boiling the acorn meat to speed the leaching process.  The meat is placed in a pot with water and boiled for 15 minutes.  The water is discarded and the nuts are boiled again.  This process is repeated until the nut meat has been leached of its tannins and tastes bland. Unfortunately, it can also boil out some of the healthy oils.  Try both methods to see if you can detect a taste or texture difference.  It is possible that one method is better suited for your needs.

    For those who think it would take many trees to produce enough flour for even a small batch of pancakes, it surprisingly doesn’t take many acorns at all.  It takes about 3 cups of acorn meat to yield 1 cup of flour. 

    Dr. Petley - Making Acorn Flour
    Dr. Petley – Leaching Acorn Tannins

    Once the acorns have been shelled, place them in a blender and add water to cover.  By grinding the acorns at this stage, it allows the tannins to leach faster than had the meat been left whole.  It only takes a minute or two to grind.   

    Dr. Petley - Making Acorn Flour
    Dr. Petley – Leaching Acorn Tannins

    Place the contents in a large jar or bowl.  I used a gallon glass jar.  Add room temperature water to the top or to cover.  Secure muslin or cheesecloth over the jar to keep out flies and dust.

    Dr. Petley - Making Acorn Flour
    Dr. Petley – Leaching Acorn Tannins

    Let the mixture settle overnight.  Notice the reddish color of the water – this is caused by the tannins.  Carefully pour off the water without losing any of the pulp.  Fill the jar again with fresh water.  I prefer to give the mixture a quick stir at every washing.  Repeat this step for about one week or until a sample of the nut meat tastes bland and not bitter.  I go by taste and not the absence of the red coloring because that never disappears completely (although it does lighten up a bit over the course of the week).  To create a basis for what is bland or bitter, sample a morsel just after grinding.  Its astringency will pucker the mouth and make it feel extremely leathery.

    Dr. Petley - Making Acorn Flour
    Dr. Petley – Straining Acorn Mash
    Dr. Petley - Making Acorn Flour
    Dr. Petley – Straining Acorn Mash

    Once the meat tastes bland, it is time to strain out all the liquid.  Line a large bowl with cheesecloth or muslin as shown.

    Dr. Petley - Making Acorn Flour
    Dr. Petley – Straining Acorn Mash
    Dr. Petley - Making Acorn Flour
    Dr. Petley – Straining Acorn Mash

    Pour the contents into the cloth. This can be done is batches if needed.

    Dr. Petley - Making Acorn Flour
    Dr. Petley – Straining Acorn Mash

    Bundle up the corners of the cloth, being careful not to spill the ground nut meat.  Twist the corners together and squeeze out as much liquid as possible.  A tincture press would make this job easier on the hands but is not required.  It would certainly press out more water and shorten the drying process.

    Dr. Petley - Making Acorn Flour
    Dr. Petley – Drying Acorn Flour
    Dr. Petley - Making Acorn Flour
    Dr. Petley – Drying Acorn Flour

    Spread the contents on a cookie sheet into a thin layer.  You can either let this air dry at room temperature (it could take several days) or place it in a warmed oven (ideally, 100-150 degrees) for several hours.  Note: Excess heat will destroy the natural oils. 

    Dr. Petley - Making Acorn Flour
    Dr. Petley – Drying Acorn Flour
    Dr. Petley - Making Acorn Flour
    Dr. Petley – Drying Acorn Flour

    Dry until the ground nut meat feels dry to the touch and does not easily clump in the hand. 


    Dr. Petley - Making Acorn Flour
    Dr. Petley – Grinding Acorn Flour

    Place the dry and cooled acorn meat in a coffee grinder or food processor that is suitable for powdering dry material.  One can also use a grain mill.  Grind to a flour or your preferred level of coarseness. 

    Dr. Petley - Making Acorn Flour
    Dr. Petley – Grinding Acorn Flour
    Dr. Petley - Making Acorn Flour
    Dr. Petley – DIY Acorn Flour

    The acorn flour is now ready to be used as food!  Store the flour in a glass jar away from light, humidity, and heat.  

    Dr. Nate Petley is a naturopathic doctor and clinical herbalist.  He lectures throughout New England sharing his expertise in naturopathic and botanical medicine. Dr. Petley blends the art and science of herbalism in his clinic and classroom, relying on his 20 years of experience studying, wildcrafting, and making herbal medicine.

    Dr. Nate Petley  |  www.drpetley.com  |  2016. All rights reserved.  All text and photos are the property of Nathaniel Petley, ND.